
Assembly & Painting example of 1/350 scale aircrafts produced by 3D-WILD
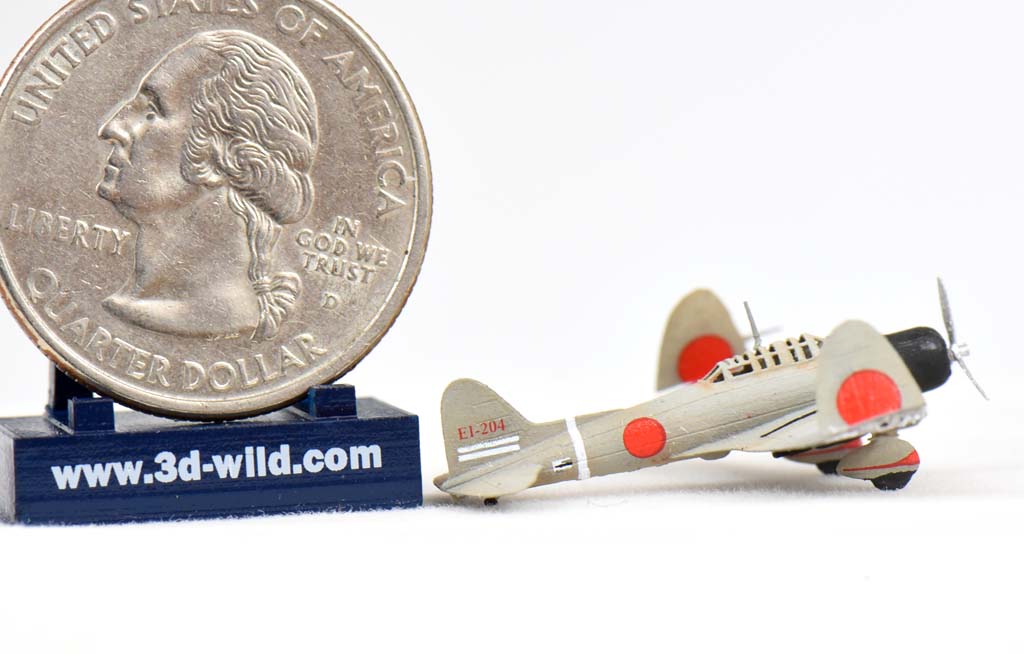
Assembly and painting is straightforward by following several steps as shown in this article. To demonstrate the assembly & painting of 1/350 scale Aircraft Series model kits we produced, the product used here is the Configuration B set (Catalog No.: DAC01) of 1/350 IJN Nakajima B5N2 "Kate" kit (pack of 6) Set. Product link please here.
Step 1. TO START!
Carefully remove the aircraft kit from the package. Keep in mind that the parts which are made of resin are fragile, so please handle with great care for all the modelling steps!

STEP 2. Applying surface primer and gentle sanding
Applying surface primer to the model surface can both distinguish imperfections for sanding, and make subsequent painting easier where paint colors can stick much better to the surface. As the material is soft, it only needs very gentle sanding to remove the unwanted imperfections. Do the sanding with great caution not to break the details!! If any detailed part breaks off, use an idea glue for repair as mentioned in STEP 8.

STEP 3. Applying black lines using airbrush (OPTIONAL)

STEP 4. Applying the base colors using airbrush or brush.
In this case, the B5N2 is supposed to be from an IJN Akagi squadron in 1941-1942. The top of the B5N2 is in dark green, and the belly of it is in silver.

STEP 5. Paint the details

STEP 6. Weathering the model (OPTIONAL)
Weathering techniques in modelling such as washing, chipping and highlighting can be used as desired. Very fine details such as panel lines can be shown well after weathering.

STEP 7. Applying the decals
For serious modelers, it is a big deal to use the right decals for the numbers and markings! 3D-WILD proudly produces the decal sheets where a vast choice of numbers/markings are included, which are based on extensive research of history and old photos.


STEP 8. Finish the model
The separated parts (which have been painted and weathered) can now be glued on the aircraft body. DO NOT use a common modelling glue such as Plastic Cement as it will not glue the parts! The commonly used KRAZY glue works but it will leave white residue after dried if not applied with minimum amount. Thus it is ideal to use a fast-drying glue which is clear after dried, such as the Maxi-Cure Extra Thick glue by Bob Smith Industries which is easily available from on-line shopping.
However, if you choose to glue the parts on the body before any surface primer/paint is applied, the best choice is to use the UV light repair pen, which is also available from on-line shopping.


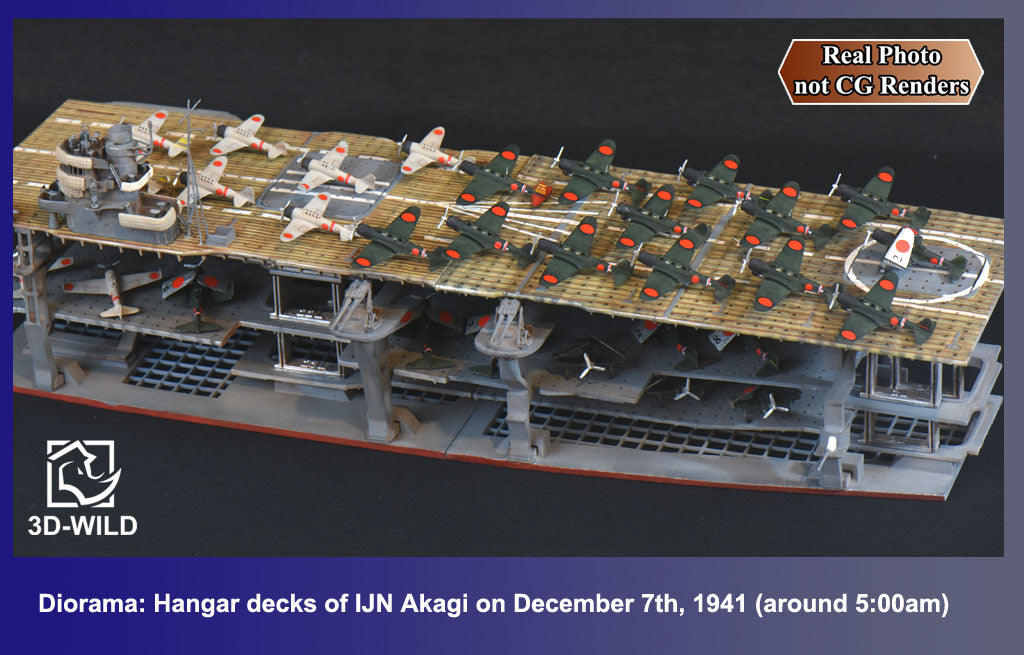
STEP 9. DIORAMA TIME!
1:350 scale models have the unique feature that they can be used to make large-size dioramas such as airports and aircraft carriers that other scale models such as 1:144 and 1:72 are hard to do due to limitation of space. Here is an example of 1:350 scale IJN Akagi carrier deck section, filled with 1:350 scale IJN aircrafts!