
Assembly & Painting example of Hangar & Deck model kits produced by 3D-WILD
To demonstrate the assembly & painting of the Hangar & Deck Series model kits we produced, the product used here is the Part 4 of 1/350 scale IJN Akagi Aircraft Carrier Hangar & Deck Set. Product link please see here.
Step 1: Applying the surface primer
The parts you get are made of resin which is either clear or in gray color. Applying surface primer to the model surface can both distinguish imperfections for sanding, and make subsequent painting easier where paint colors can stick much better to the surface.

Step 2: Remove unwanted supports and imperfections
There are some supports (typically cylindrical sticks) on the model kits which are there to make production easier but not needed for the model kits themselves. Follow the kit instructions to remove them carefully. A "hot knife", which is commercially available at a not-too-high price, can make the job easier than using a regular craft knife. However, safety always comes first!!

As the material is soft, it only needs very gentle sanding to remove the unwanted imperfections. The parts are air-sprayed on with black lines, which can enrich the color gradient for an improved visual effect after the base colors are applied.

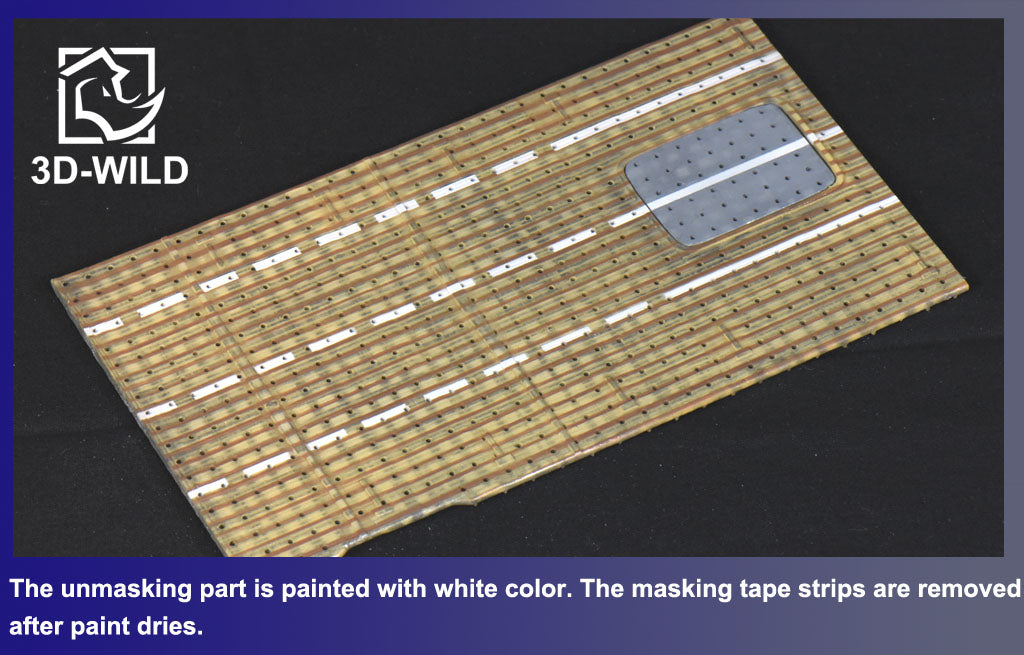
Step 3: Paint the flight deck part


Step 4: Paint other parts


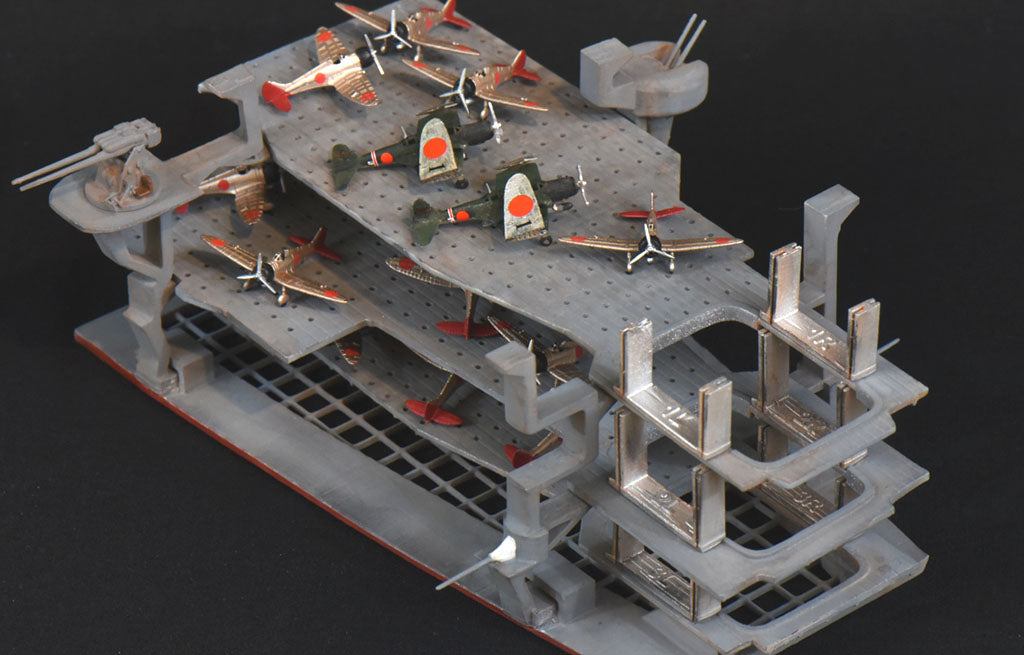
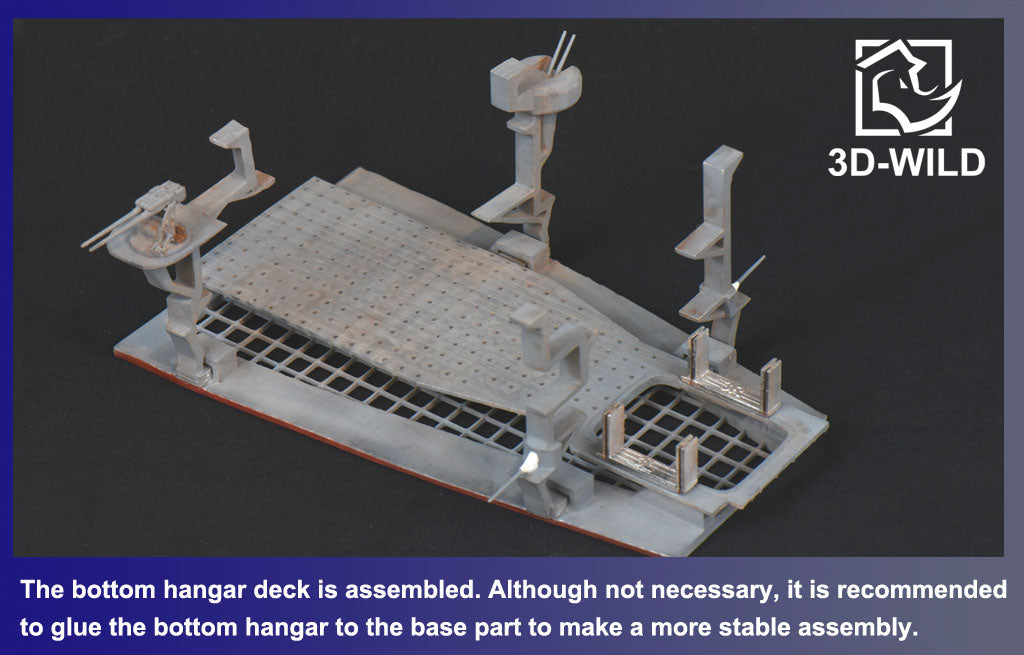
Step 5: Assembly of all parts
Most of the parts in our Hangar & Deck Series model kits have the options whether to be glued to other parts, or to be left as unglued and removable parts. For parts that have to be glued, it is import to choose the right glue! DO NOT use a common modelling glue such as Plastic Cement as it will not glue the parts!
If you choose to glue the parts after the parts are painted, the commonly used KRAZY glue works but it will leave white residue after dried if not applied with minimum amount. Thus it is ideal to use a fast-drying glue which is clear after dried, such as the Maxi-Cure Extra Thick glue by Bob Smith Industries which is easily available from on-line shopping. However, if you choose to glue the parts before any surface primer/paint is applied, the best choice is to use the UV light repair pen, which is also available from on-line shopping.


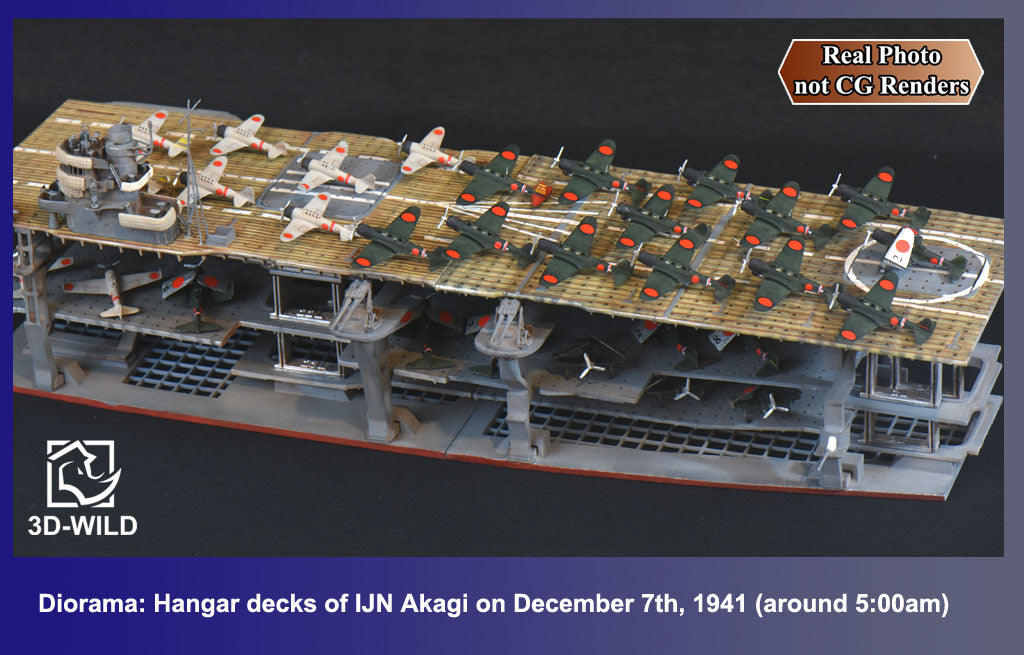
Step 6: DIOROMA TIME!!
The finished set can form a diorama by itself after other elements such as aircrafts, pilots, sailors, bombs and so on. Here as an example, we made a diorama, using the Part 3 and Part 4 sets, to show the hangar & deck of Akagi on December 7th 1941, when she was about to launch the first wave of airstrike on Pearl Harbor. 9 A6M2 Zeros and 27 B5N2 Kates (12 armed with torpedoes and 15 with bombs) are being lifted up from hangar decks to the flight deck, preparing to leave.